pop up description layer
HOME
Cryptozoology UFO Mysteries Aviation Space & Time Dinosaurs Geology Archaeology Exploration 7 Wonders Surprising Science Troubled History Library Laboratory Attic Theater Store Index/Site Map Cyclorama
Search the Site:
|


|
x
Supplies: Paints- A spray primer, plus spray paint(s) that will form the base for the rest of your decorations. Younger workers should use poster paints when doing the details for it is easier to clean up. Older workers may want to use acrylics or oil for finer results. Optional Supplies: a clear, inexpensive Halloween mask, Model Magic modeling compound and hot glue gun.
Optional Three-Dimensional Features. Many mummy cases were carved with three dimensional features on the lid. This often included the person's face and his crossed arms. In the case of King Tut it also included a rod and crook, which he held in his hands, and a snake and vulture head piece which he wore on his head. You may want to add some three-dimensional features before you start painting. In our example, we hot-glued an inexpensive clear plastic Halloween mask that cost about a dollar to the lid as a face. You might want to try adding features such as the crossed hands, or the snake and vulture head piece by molding them with a clay-like compound. We would recommend something like Model Magic made by Crayola. This material can be worked like clay, but when it air dries it is tough, but very light. The fact that it is light means it will be less likely to become unglued after you attach it to the lid. Mold your shapes on a flat surface, and wait for it to dry completely. Then use the hot glue gun to attach it to the case.
STEP 1: You need to use a can of spray primer to cover your case inside and out. This usually comes in white or gray. We selected gray for our example case, but you may find it hard to cover the gray if you decide to apply another coat of paint on top that is a light color. You might want to try using two cans of primer: gray for the interior of the coffin and white for the exterior. Do not skip the primer. If you do you will have a difficult time with later coats of paint. Make sure you spray the case in a ventilated place and follow all safety instructions on the can. STEP 2: After you have your coffin primed you will want to spray on a base coat of paint. This is the primary color of your mummy case exterior. In our example we used gold paint. STEP 3: At this point you will want to paint the details onto your case using paint brushes and paints. For younger kids poster paints are satisfactory and are easy to clean up. However they quickly run when they get wet. In addition they do not seem to work as well as acrylic or oil paints. When you are satisfied with your mummy case the project is complete. Drop us a line and tell us if you found these pages to be helpful. Back to the UnMuseum's Mummy Room.
Copyright Lee Krystek 2001. All Rights Reserved. |
 Decorating
the mummy case:
Decorating
the mummy case: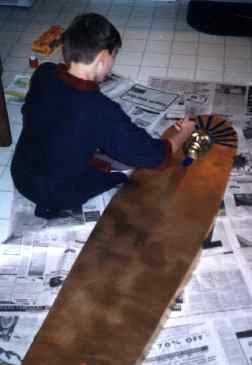 It
is finally time to get really creative with this project and
let your artistic talents flow. Before starting this phase you
may want to go to the library and get some book on mummies and
mummy cases, or check our page on
It
is finally time to get really creative with this project and
let your artistic talents flow. Before starting this phase you
may want to go to the library and get some book on mummies and
mummy cases, or check our page on 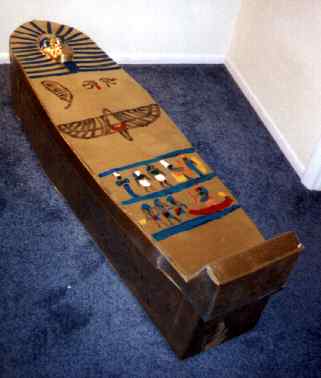 Painting.
|
Related Links |
|
|